
Leeds Glass Suppliers. Call our team on
Get A Fast Quote
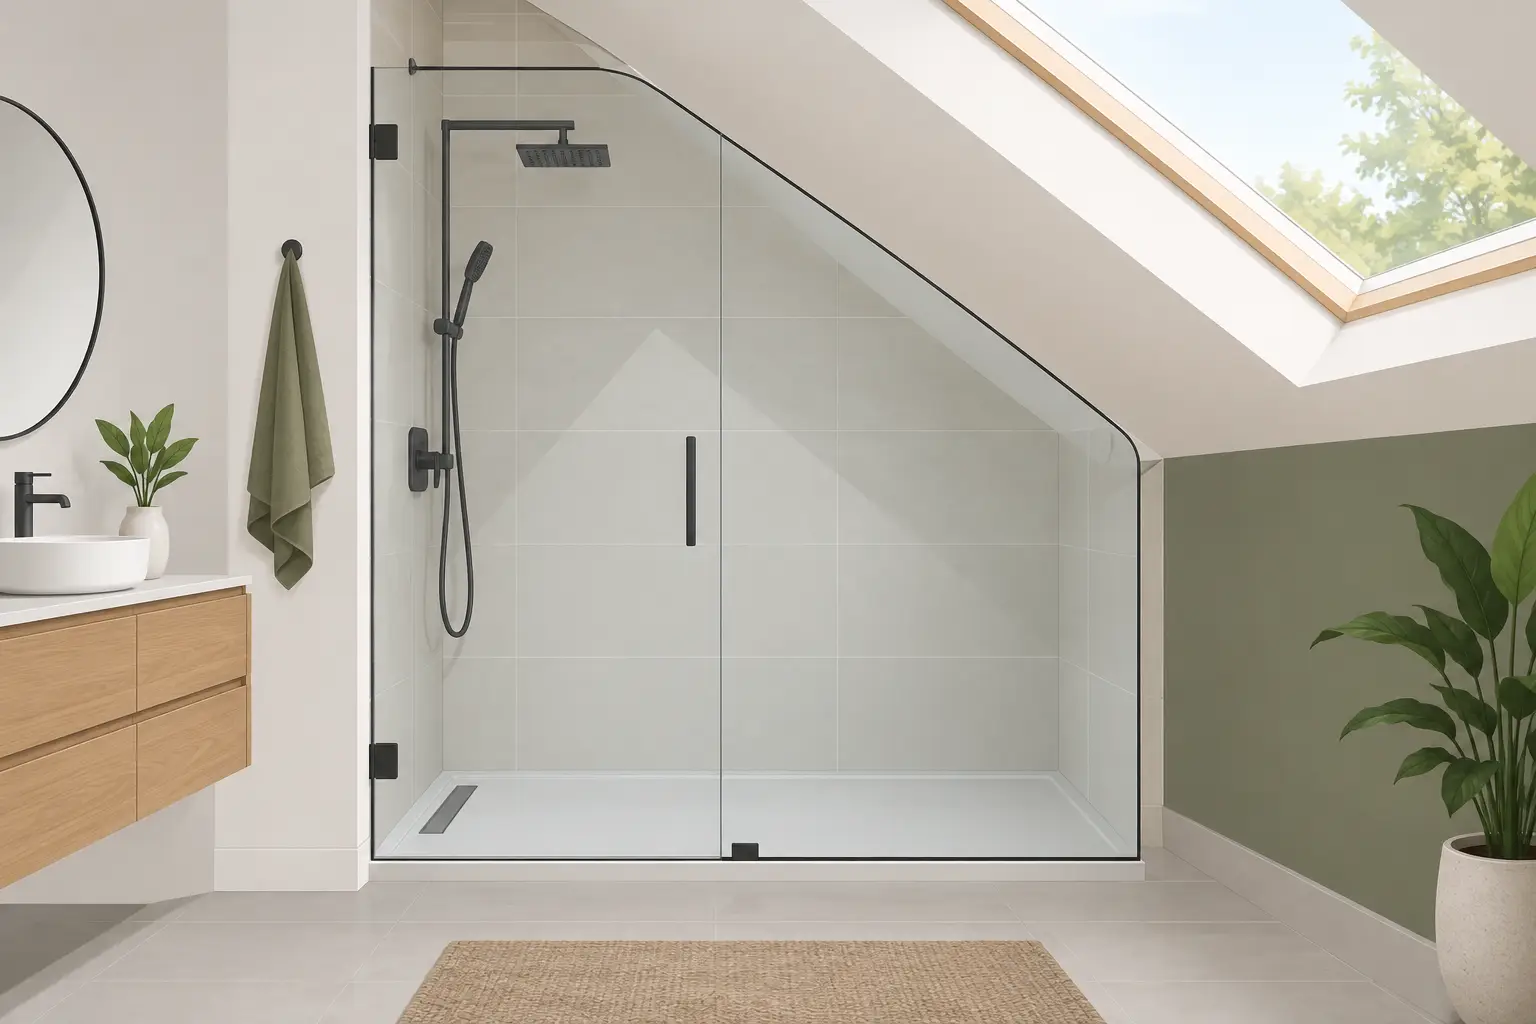
A sloping ceiling can turn an ordinary shower enclosure into a made-to-measure job. Whether it is part of a loft conversion, an attic bathroom or a period property with an awkward roofline, a shower screen for sloping ceiling needs to be planned around the room rather than forced into a standard size. Done properly, it can look clean, feel spacious and keep water where it belongs.
The key is to treat the slope as part of the design from the outset. The glass, wall fixings, shower position and door arrangement all need to work together. A few accurate measurements and the right advice early on can prevent an expensive compromise later.
Off-the-shelf shower screens are made for square walls and consistent ceiling heights. In a bathroom with a pitched roof, the glass may need one angled top corner, a fully raked top edge, or a notch to work around a beam or bulkhead. Even when the room looks straightforward, walls are not always plumb and tiled surfaces can vary by several millimetres.
Trying to cut down a standard panel is not a safe option. Shower glass must be toughened before it reaches site, which means it cannot be cut, drilled or reshaped afterwards. The panel has to be manufactured to the final dimensions and shape.
That is where bespoke glass makes the difference. A made-to-measure screen can follow the ceiling line accurately while retaining sensible glass height around the showering area. The result is more practical than a small standard panel and more refined than filling an awkward gap with plastic trim.
The best layout depends on the available headroom, the position of the shower valve and shower head, and how the room is used. A fixed panel is often the simplest and most reliable choice, especially for a walk-in shower beneath the higher part of the ceiling. It has fewer moving components, is easy to clean and can be shaped precisely to the roofline.
A hinged door can work well where there is enough clear height for the door to open without catching the ceiling. However, this requires careful checking. The top of the door, its hinges and the opening arc must all clear the slope. In tighter loft bathrooms, a fixed panel with a generous entry gap may be a better solution.
Sliding doors are sometimes considered where space is limited, but the track needs a level, uninterrupted line. A sloping ceiling above does not automatically rule one out, although a bespoke arrangement becomes more involved and should be assessed on site.
The shower head also matters. If it sits directly under the lowest point of the slope, taller users may find the space restrictive even if the screen itself fits perfectly. Often, moving the shower head slightly towards the taller side of the room creates a far more comfortable showering area.
For many sloping ceilings, a fixed glass panel is the strongest choice. The panel can run from a full-height wall and follow the pitch down towards the lower side, or it can be designed with one angled upper corner. It gives the bathroom an open feel while providing enough splash protection when sized correctly.
As a guide, the screen needs to extend far enough beyond the shower head to contain spray. The exact width depends on the shower type, water pressure and whether the user prefers a more open or enclosed feel. A compact room may benefit from a return panel, while a larger wet-room-style layout may only need one carefully positioned screen.
A door can make sense when the shower needs to be fully enclosed or when the bathroom is prone to draughts. It is not always the right answer under a slope. The usable headroom at the entrance is more important than the highest point of the room, and a door that technically fits can still feel cramped.
Where a door is practical, the glass can be made with an angled top edge to match the ceiling. The hinge side must be supported by a solid wall or properly prepared structure, not simply fixed through tile into weak backing. Your installer will also need to allow for the door’s weight, adjustment and seal position.
The most common mistake with an angled shower screen is measuring too early. Take final dimensions only after the walls have been boarded, tiled and finished. Tile thickness, adhesive build-up and waterproofing details affect the finished opening, while a newly plastered or tiled wall may not be as straight as it appears.
A proper survey records more than the width and height. It should establish the precise angle of the ceiling, the glass height at both sides, the plumb of each wall and the level of the shower tray or floor. The location of pipework, shower controls, niches and tile joints should also be considered before any holes are drilled.
For a panel with a raked top, the angle cannot be guessed from a photograph or a single diagonal measurement. A template, digital angle measurement or detailed site survey gives the fabricator the information needed to cut the glass accurately.
It is also worth checking whether the ceiling slope itself is straight. Older homes, converted lofts and timber-framed roof sections can have slight variations along their length. A screen does not have to touch the ceiling, and usually should not, but the gap needs to look intentional and remain consistent where possible.
Shower screens are normally made from toughened safety glass. For a fixed shower panel, 8mm glass is a popular choice because it feels substantial without becoming unnecessarily heavy. Larger panels or doors may require 10mm glass, depending on their dimensions, the fittings used and the support available.
The glass should be specified alongside the hardware, not separately. Hinges, support bars, channels and brackets all have limits on glass thickness and panel weight. In some rooms, a discreet stabilising bar adds essential rigidity to the top of a fixed panel. Under a sloping ceiling, the bar may need to be cut to length, mounted at an angle or replaced with an alternative fixing arrangement.
Wall channels can allow a small amount of adjustment where walls are out of true. They offer a neat, practical option for many installations. Brackets create a more minimal look but usually allow less tolerance, so they suit walls and measurements that are especially accurate.
For a clean finish, most bespoke shower screens are left frameless or use minimal hardware. The glass itself remains the main feature, helping light travel through a compact bathroom. Clear glass is the usual choice, though tinted or obscured glass can be considered where privacy or a stronger design statement is needed.
A shower screen is designed to manage splashes, not turn every layout into a fully sealed cubicle. This distinction is especially relevant with walk-in showers. The screen should be wide enough, the floor should fall correctly towards the drain, and the shower head should not direct water towards the opening.
Seals are useful around doors and at the bottom edge where required, but too much sealing can spoil the look and make cleaning harder. Silicone should be applied neatly on the appropriate external edges, with care taken not to block any drainage route built into the fittings or tray.
If the room is a wet room rather than a shower tray installation, the waterproofing beneath the finished floor is just as important as the glass. A beautiful screen cannot compensate for a floor that holds water or falls away from the waste.
Before confirming a bespoke screen, establish whether the wall behind the tiles can safely take the glass and fittings. Ask how the panel will be supported, whether a brace is needed and where the fixings will sit in relation to tiles and pipework. It is also sensible to agree who is responsible for final site measurements, particularly where several trades are involved.
For homeowners, a site visit can remove much of the uncertainty. For builders and bathroom installers, supplying clear finished-opening measurements, photographs and a simple sketch of the slope helps the glass specification move quickly. The more accurate the information at quotation stage, the less likely the design is to need revisiting once the room is ready.
Yorkshire Glass manufactures bespoke toughened shower screens in its Leeds workshop, allowing angled cuts, non-standard sizes and carefully selected fittings to be planned for the room in front of you rather than a catalogue diagram.
A sloping ceiling need not dictate a cramped or makeshift shower. With the finished room measured properly and the glass designed around how the space will actually be used, it can become one of the bathroom’s most distinctive features. If you are unsure which layout will give you the best headroom and splash protection, bring your measurements and a few photographs to a glass specialist before the tiling and fitting decisions are locked in.